
Guide · Photographing a subject
How to photograph a subject so a reading can actually see it
A reading can only work with what the frame shows. A few quiet minutes with light and position usually beat a second guessing attempt.
A visual reading begins from whatever the camera happened to record. When a scan comes back vague — plenty of hedging, few anchors — the photograph is often the first thing worth fixing. None of this needs special equipment: the checks below work with a phone camera and a little patience.
One rule sits underneath every step: show the subject clearly, fill the frame with it, and keep the light honest. What a photo shows plainly, a reading can describe; what it hides, a reading can only guess at.
One clear subject, one clear photo
A reading works best on one thing at a time. A shelf of objects or a crowded corner forces the question 'which of these did you mean?' and spreads a thin description across all of them. Pick one subject and let it fill most of the frame, with a small margin so its edges and corners stay visible.
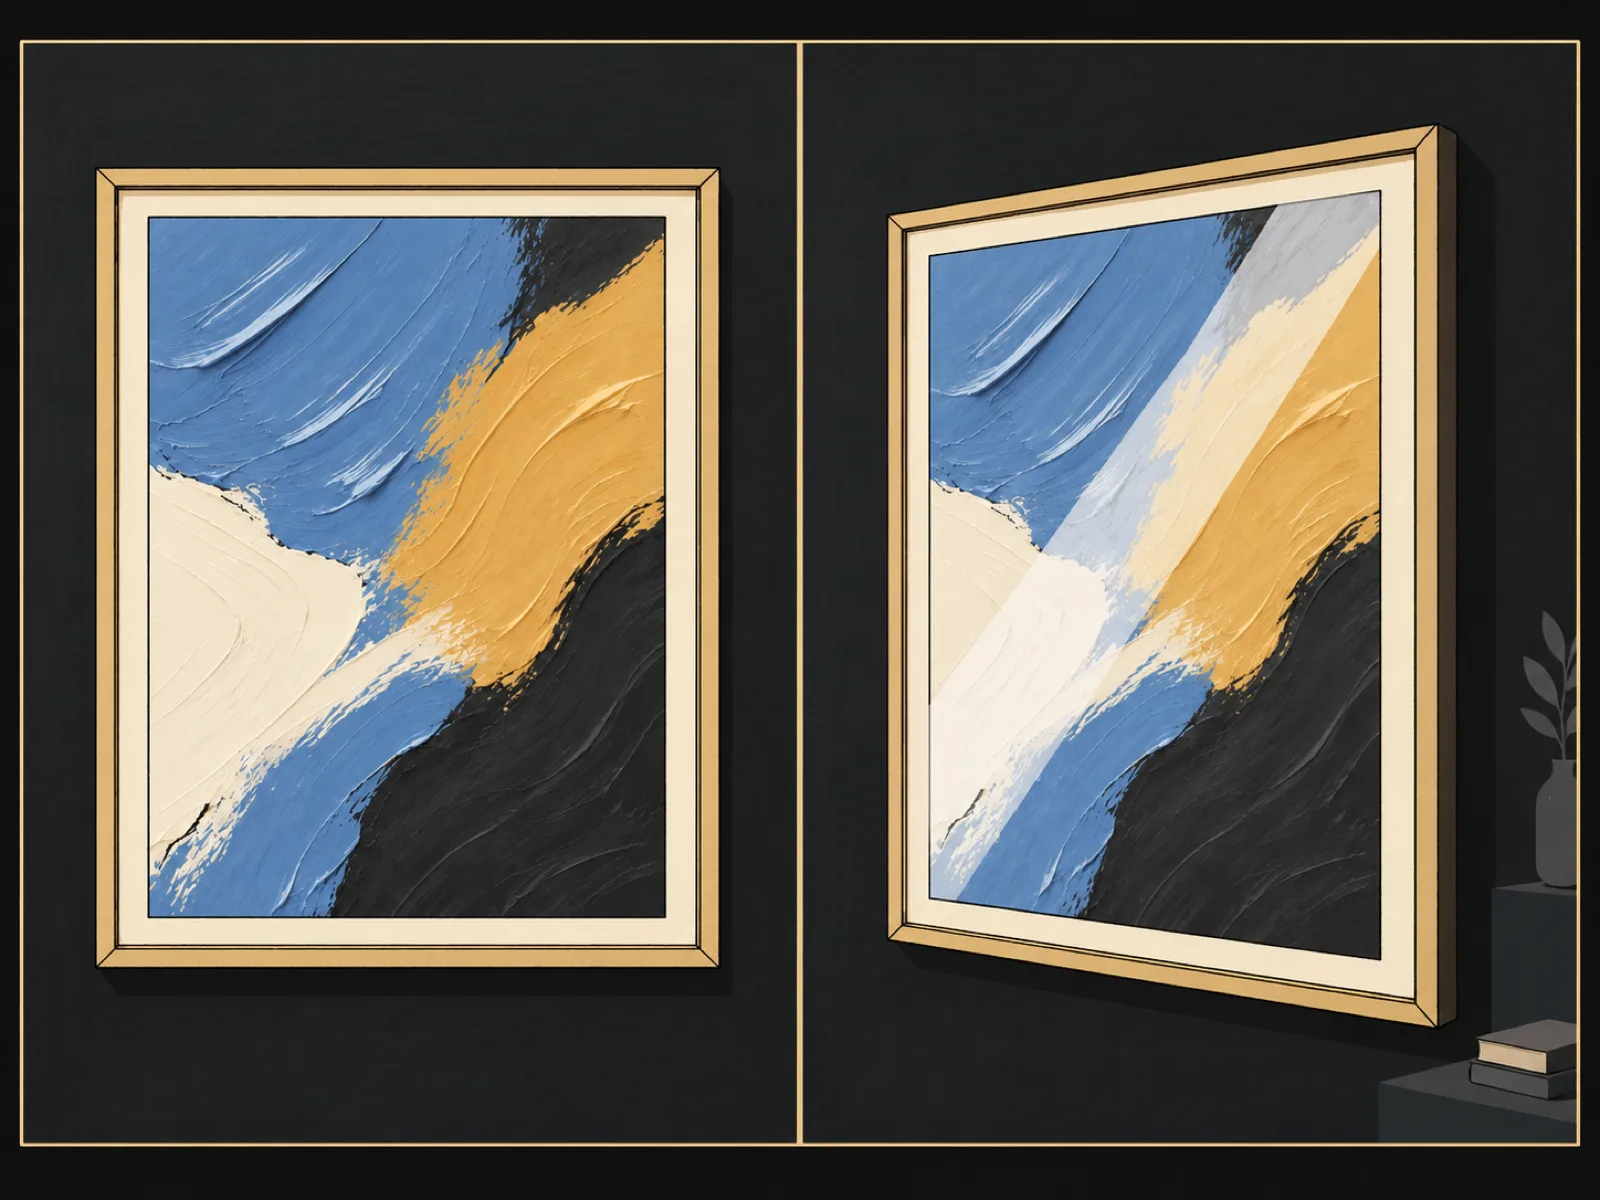
Angle matters as much as distance. Photograph flat work — paintings, prints, posters — straight on, squared up so the edges run parallel to the frame. A steep angle turns rectangles into trapezoids and smears one end out of focus. For objects, choose one informative side first; extra views are separate photos, not one compromised angle.
Orientation and size count too. Shoot in the orientation that fits the subject, hold the phone level, and remember that a sharp 12-megapixel frame beats a fuzzy 'high-resolution' shot — modern phone cameras already capture more than a reading needs, so clarity, not megapixels, is the variable you control.
If you cannot isolate the subject — a painting high on a wall, a sign above a crowd — take the best available frame anyway and note the limitation. A partial view honestly described beats a sharp photo of the wrong thing.
Light first, zoom second
Soft, even light is the whole trick. Daylight near a window — but out of direct sun — gives the camera everything it needs. Avoid mixing light sources: a warm lamp plus cool window light leaves colour casts that a reading may describe as faded varnish or staining.
Conservators photographing objects for records use controlled, even illumination, and reserve strongly angled light for deliberately revealing surface texture — the same trade-off applies on a shelf at home.
Prefer moving closer over pinch-zooming: digital zoom discards detail the reading could have used. And keep the flash off — it flattens texture, throws hot spots onto varnish and glass, and is banned in many galleries anyway.
Outdoors the same logic holds: open shade or an overcast day gives buildings and sculpture their most even light, while midday sun carves hard shadows that can hide as much as they reveal.
Glass, glare and reflections
Glass turns the room into part of the photo: windows, lamps, and your own pale silhouette all land on the picture. Shift your position a few degrees until reflections leave the important area; moving the subject's relationship to a window usually fixes more than any filter. Smarthistory's lesson on photographing art even suggests dark clothing for gallery shooting — you are part of the reflections.
Check the shot immediately, zoomed in on the screen. If a highlight wipes out a signature or a face, reshoot while you are still standing there. Glare discovered at home means the evidence never existed.
Follow the room's rules while you work: no flash where it is prohibited, no photographing works where signs forbid it, and never touch or reposition anything for a better angle. The National Gallery in London, for instance, allows personal non-commercial photography unless a sign says otherwise — local signage always wins.
If you cannot remove a framed work from its glass — and usually you should not — shoot through it rather than under it. Tilting the work off the wall risks both the frame and the photograph.
The back, the label and the frame
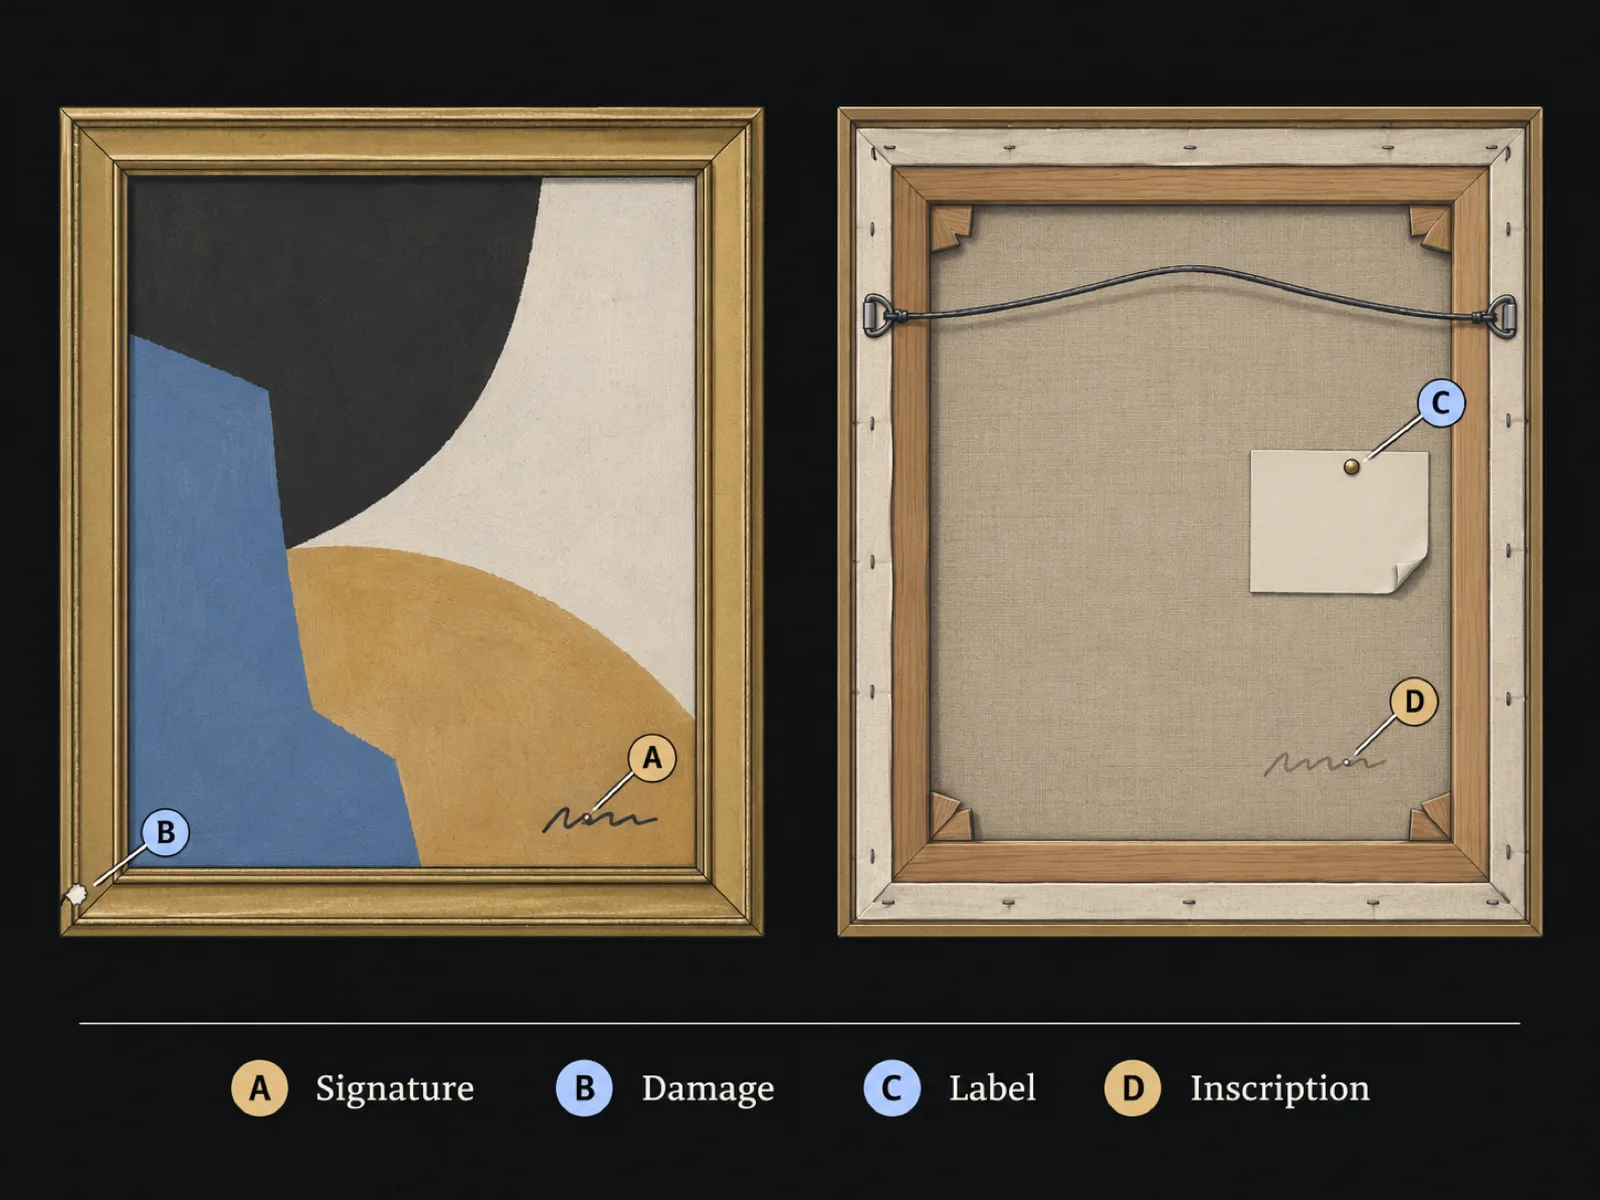
Identifying detail often lives everywhere except the front. Frame labels, gallery and dealer stickers, handwritten titles, inventory numbers, and stamps on stretcher bars all carry information — and they vanish the moment a work is reframed or moved. Photograph the whole back straight on, then take a separate close-up of every mark, including the ones that look blank or illegible.
The same applies to a museum wall: photograph the label next to the work as well as the work. Its title, date, credit line, and accession number are exactly the anchors a later search or a guide to reading museum labels needs.
And keep the photo of the label or inscription paired with the photo of the work — rename them, put them in one album, or just take them in sequence. Months later, the connection between 'the blue vase' and 'the blurry mark under the blue vase' is the thing you will be glad you kept.
A detail crop when something matters
After the whole-subject shot, take separate close-ups of anything that might carry information: a signature or date, a maker's mark, an area of damage, an unusual material. Tap to focus, hold the phone steady, and resist getting too close — phone cameras blur at very short range, so a slightly wider crop that stays sharp beats an extreme close-up that does not.
Details are evidence, so keep them legible rather than dramatic. A signature photographed in shadow proves less than a dull, readable one.
Sharpness is the one thing to check before you lower the phone: zoom the preview to 100% and confirm the detail resolves. A readable mark is worth far more than a beautiful composition — crop for legibility, not drama.
What makes a photo unreadable
Before submitting, run a quick audit: too dark to see surface detail; motion blur; the subject tiny inside clutter; glare across the centre; an extreme angle; a heavy filter or HDR that changed the colour. Any one of these means retake, not submit — the support page covers what to do when a scan still fails on a good photo.
Some things stay outside the frame no matter how well you shoot: the back you did not photograph, the scale of the work, texture sealed behind glass. A reading can only describe what is there — the essay on what a camera can and cannot tell you is the fuller version of that limit, and the methodology shows where a reading draws its evidence line.
If you only get one shot — a sale viewing, a packed gallery — spend it on the whole subject in the best available light, and take the label photo second. A missing detail is a gap; a missing overview means nothing else can be placed.
Try it: photograph something on your shelf
Pick any object you own and run the full sequence once — it takes about five minutes.
Then run the comparison that makes the exercise real: take your best frame to the scanner and read the evidence lines it returns against what you saw. If the reading names the features you photographed, the photo did its job; if it hedges on basics, the checklist above says which variable to revisit.
Clear the stage. Move the object away from visual clutter, or clear what sits behind it in the frame. A plain wall or tabletop is enough.
Kill the flash, find even light. Work near a window or under diffuse room light. Check the preview for hot spots and mixed colour casts before shooting.
Square up. Hold the phone so the subject faces it straight on. For anything framed, centre it and check that all four corners sit inside the frame without distortion.
Fill the frame, keep the edges. Let the subject take most of the frame while every edge stays visible. If it will not fit, step back rather than cropping a corner.
Take the detail shots. One photo each for signatures, marks, labels, damage, and the back. Check focus on every one before moving on.
Review while you are still there. Zoom in on each shot. If anything you would want to read is blurred, glared out, or too dark, reshoot it now — not at home.
Take another look
Look back at the last photo you took of something you wanted identified — which step would have improved it? When you have a frame you trust, take it to the scanner and compare its evidence against your own notes.
Sources
- Smarthistory, How to photograph works of art (opens in a new tab)
- Canadian Conservation Institute, Lighting methods for photographing museum objects (CCI Notes 4/2) (opens in a new tab)
- National Gallery, Plan your visit (opens in a new tab)
The shooting checklist and exercise are Art Says Hi editorial guidance. Sources last checked 2026-09-29.
Read a photo of your ownYour photo is only sent when you choose Start reading.
Spotted an error? Tell us