
Guide · Designed objects
How to examine a designed object
A handle, hinge, or join often explains more than a famous silhouette.
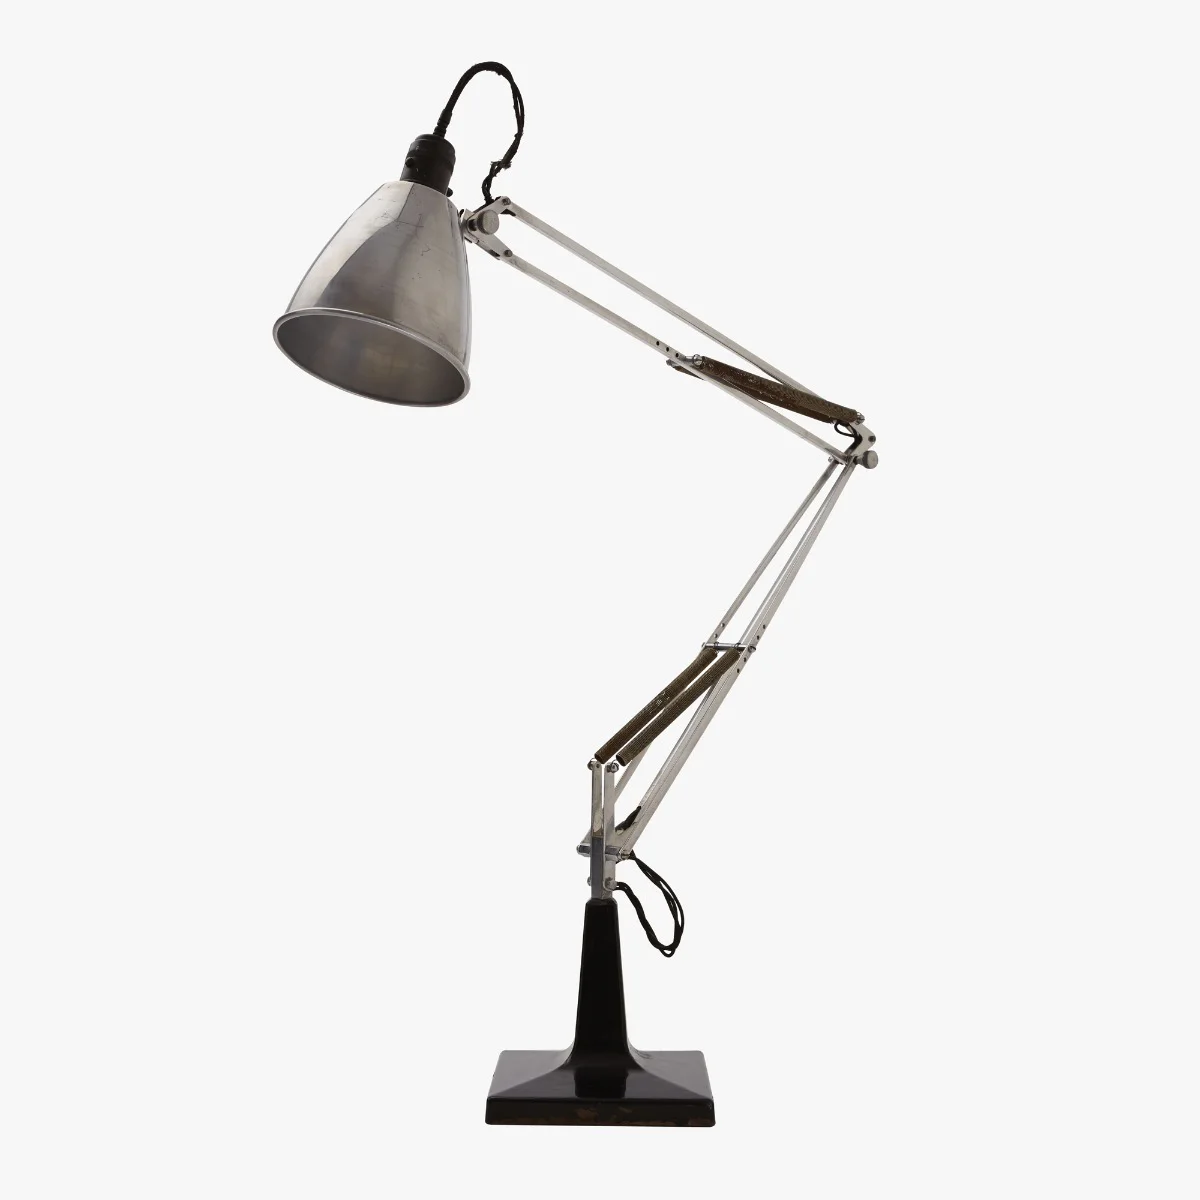
Designed objects ask to be used, carried, opened, adjusted, or lived with. Their appearance matters, but so do the decisions that connect a form to a task. Cooper Hewitt's form and scale exercises (opens in a new tab) invite us to ask how an object's function might change when its size or shape changes. That is a useful starting point for a chair, lamp, appliance, or everyday tool—even when you do not know its maker.
Begin with the task
What does the visible form seem to make possible? A grip invites a hand; a base supports weight; a hinge suggests movement. Say “seems to” until you have enough information to be certain. A photograph can show a joint, but may not show how it works, how an object feels, or whether a photographed example is original, repaired, or altered. A maker's record or museum catalogue can help with those questions.
Look for contact points. Where would a hand, body, surface, or another object meet this one? How does its shape direct that meeting? This approach keeps attention on experience rather than treating the object as a list of famous names.
- The pivot point
- Three possible positions
Try this in three steps
Imagine the use. Describe the likely task in plain language. Find the parts that appear to support, guide, balance, or protect it. Keep alternate uses in mind.
Trace the form. Follow one line from base to working end. Pause at visible joints, changes in thickness, or changes in material. Which part appears fixed, and which might move?
Check the context. Separate what you saw from what a reliable source says about materials, manufacture, dates, and designer. A scuff may be visible; its cause is not automatically knowable from the image.
The silhouette you notice first.
Form
What the object seems to do.
Task
Where a hand would meet it.
Touch point
A worked example: the Anglepoise lamp
In the Art Says Hi Anglepoise reading, follow the arm from base to shade and locate the visible pivots. Compare the substantial base with the slender upper parts, then ask how the shade directs attention toward a patch of light. The Design Museum's Anglepoise entry (opens in a new tab) provides documented design history. The local image invites questions about balance and motion, but it cannot establish a particular lamp's manufacturing date or mechanical condition.
Visible in the photo
- Where the parts join and pivot
- Surface finish, wear, and scuffs
- How base, arm, and head relate
Needs maker documentation
- Materials and how they were made
- Date, model, and designer
- Original, repaired, or altered parts
Look beyond the silhouette
An object's outline may be memorable, yet its small practical decisions often explain why it looks that way. Compare the lamp with the Eames Lounge Chair example: one is adjusted toward a task, while the other relates closely to a seated body. That comparison is an invitation to observe, not a claim that the objects share a design process. Ask what would change if a grip were larger, an arm shorter, or a seat higher. The answer may reveal the relationship between scale, use, and visual character.
Take another look
Which small part tells you most about how the object is used? If you have a photo of an object you want to explore, start a browser reading and submit it only when you select “Start reading.”
Sources
The observation exercise and comparison are Art Says Hi editorial synthesis.
Read a photo of your ownYour photo is only sent when you choose Start reading.
Spotted an error? Tell us